Create a New Aware Project
To create a new Aware project,
1. Click on the create new project icon ![]() .
.
2. Give the project a name. Then, choose the units of measurement that you prefer for the project (feet, miles, meters, or kilometers). Finally, select the datasets that you want to generate the web reports and data package. You can either select the datasets individually and move them to the Selected Reporting Datasets column, or you can choose to move all Pivvot datasets into the Selected Reporting Datasets column.
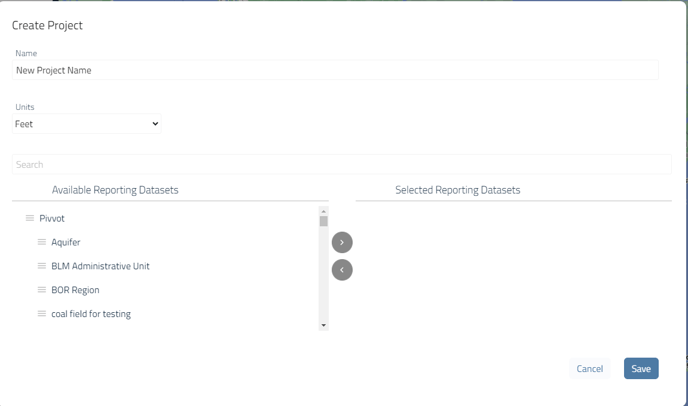 3. Click Save
4. The next step is to create project Locations. Follow the instructions below for
- Creating Project Location from Pivvot Layers
- Creating Project Locations by Digitizing or Uploading a Location (KML/KMZ)
Please note: There is a 150 location limit per Aware project.
Creating Project Location from Pivvot Layers
You can use features from Pivvot layers as locations in your Aware project.
Follow the steps below to take advantage of this feature:
1. To find a specific feature, either perform a text search or click on it directly on the map. This will display the results in the search panel. You can enable the relevant Pivvot layers and utilize the click to search function to easily retrieve the results for the feature you are interested in using for your project.
Layers you can use to find locations:
- Communication Towers
- Electrical Substations
- Existing Pipelines
- Infrastructure and Structures
- Powerlines
- Property Parcel
- Transportation
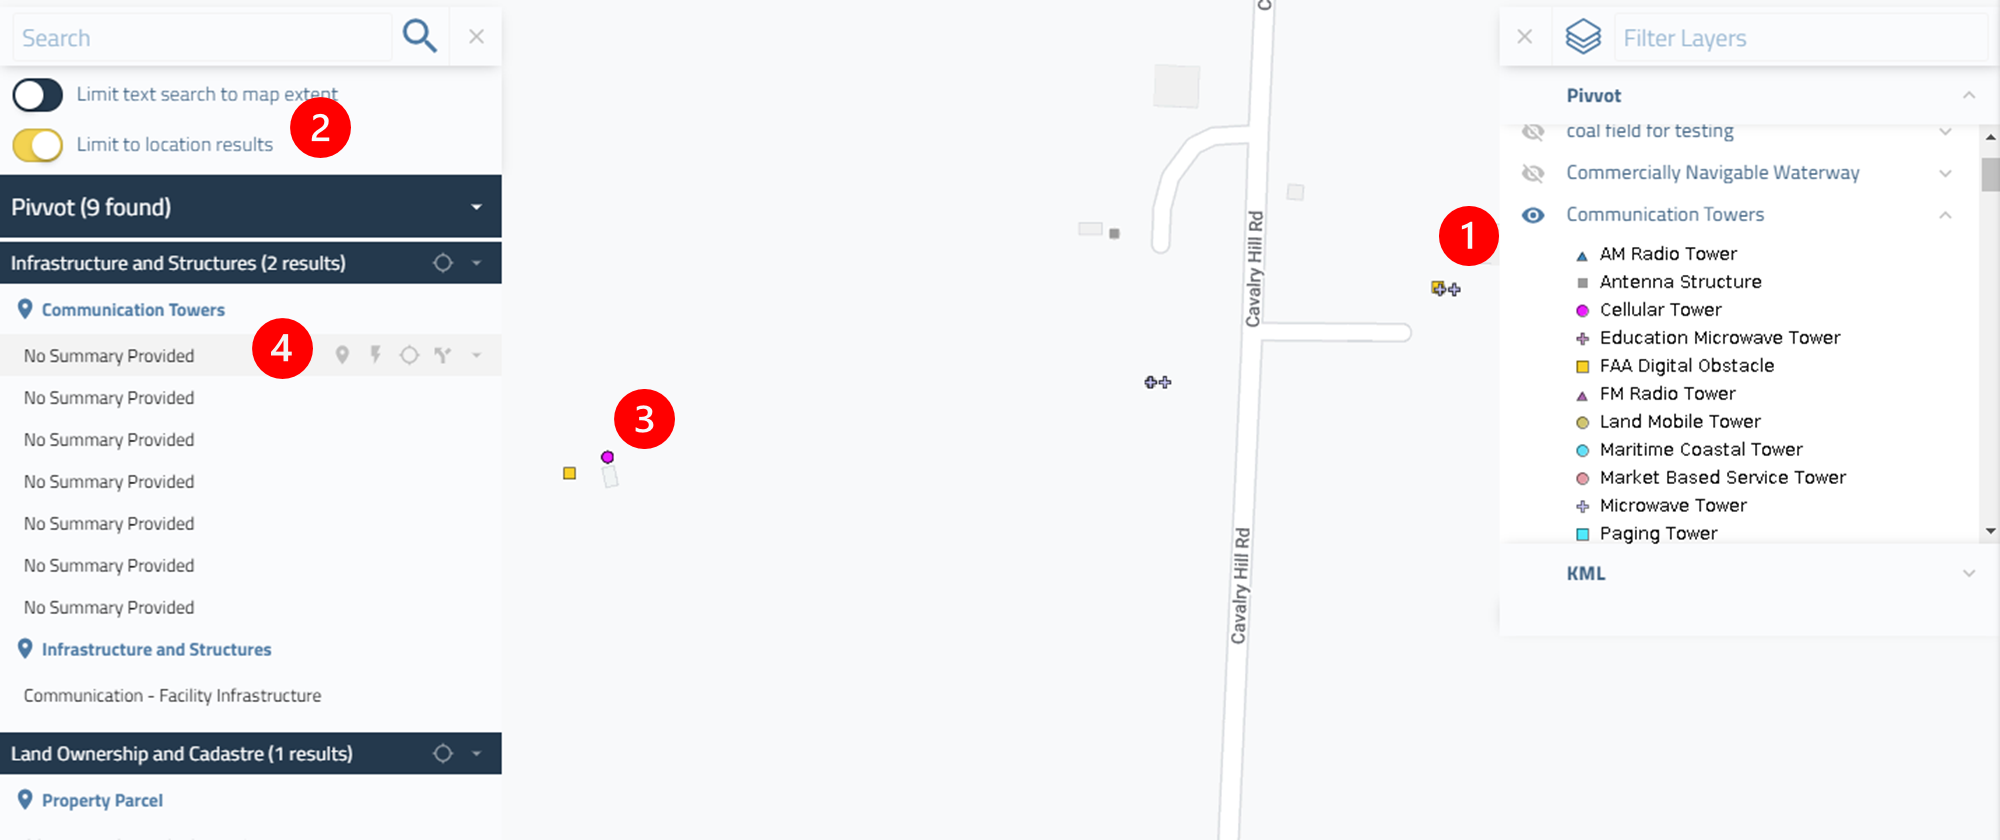
| 1. | Turn on the Pivvot layer to visualize a potential location on the map. |
| 2. | In the search panel, click the Limit to location results slider |
| 3. | Click on the feature you would like to add to your project |
| 4. |
In the search panel, hover over the name of the feature and options to the right hand side of the record will appear. Select the Add to Aware symbol |
 to add it as a location in your Aware project. You can then add additional features to your project of any type.
2. Once added, you can modify the buffer and name of the location.
3. Generate deliverables for your project. See Download Aware Project Data and Generate and Access Aware Report Deliverables for more.
Creating Project Locations by Digitizing or Upload (KML/KMZ) a Location
To create an Aware project, you have the option to draw a point, line, or polygon on the map.
1. Click on point, line or polygon to create your first location or click on upload data to upload your location.
 Point
Point Line
Line Polygon
 Upload KML/KMZ*
2. Place the geometry on the map.
3. Name the location and edit the buffer.
4. Add additional geometries or features to your project location list.
5. Generate deliverables. See Download Aware Project Data and Generate and Access Aware Report Deliverables for more.
*Your KMZ file can contain multiple geometries and geometry types to create Aware locations.