How to share a Siting Project
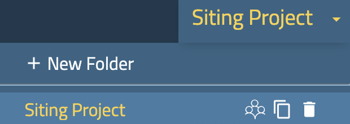
1. Select project drop down.
2. Hover your mouse pointer over the project you want to share. Click on the share icon.
3. To share the project with other Siting users*, you can find the list of available users in the left menu. Simply select the users you want to share the project with and move them to the Shared users menu on the right. You have the option to move all users at once by clicking on the move all button, or you can select individual users. If you want to grant them editing access, make sure to check the edit access check box next to each user.
You have the option to select all when assigning editing access by clicking on the Select All checkmark icon at the top of the column.
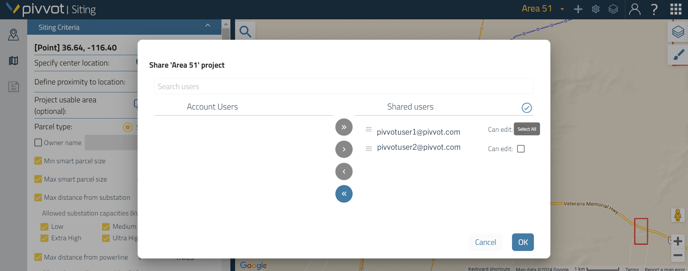
4. Click Save
*Note: In order to share a project, the user must have access to Siting. The account administrator has the authority to add users and provide them with access to Siting. To learn more about managing user accounts, please refer to the "Account: User Console" section for additional information on account administration.
How to Share a Folder of Projects
1. Create a folder and organize your projects. See Organize Projects for instructions on creating folders and sub folders.
2. Click on the share icon.
3. When sharing your folder with a Siting user, simply move their username from the left side to the right side. If you want the user to only be able to view the folder, make sure to leave the edit box unchecked. However, if you would like to grant them editing access, go ahead and check the edit access check box.
4. Click Save.
Shared Projects Organization
Shared projects and folders will appear in your project drop down as "Shared with Me"