Site Sketch Overview
Site Sketch allows users to upload and draw features within a project site. This feature is designed for early stage site layouts and more refined control defining useable/constrained area. It also provides an opportunity to incorporate external information into your site layout (survey, site visit, solar layout).
This article covers the following topics:
Start a Sketch
A Site Sketch is specific to an individual site, therefore you will need to select a site in the Project Sites tab to get started. Selecting a site record will make it active in the Site Sketch tool and will also display any existing Site Sketch features on the map.
Once you've selected a site you will expand the Site Sketch pane on the left-side bar.
Below are two options to create Sketch features:
- Upload a KMZ/KML file of your Sketch features. To do this:
- Click the folder icon.

- For every feature in your KMZ/KML, a Sketch will be created.
- Click the folder icon.
-OR-
- Freehand sketch a feature. To do this:
- Select a geometry type to draw.
 Point
Point Line
Line Polygon
- Begin drawing a feature by left-clicking on the map. Double clicking will end the sketch and create a record in the Site Sketch panel.
- Select a geometry type to draw.
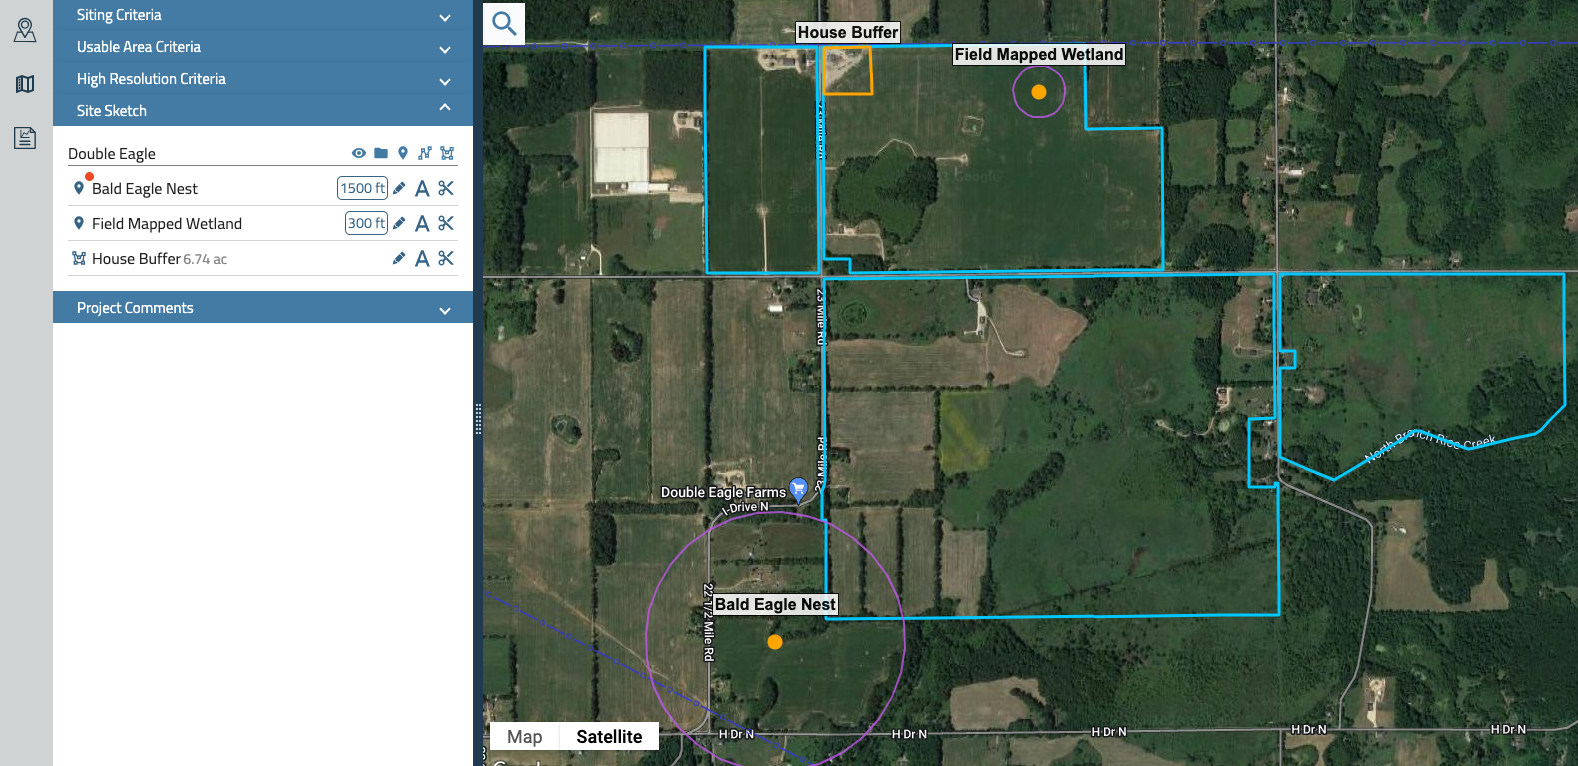
Note: If there is a red dot next to the name of your sketch, part of the Sketch is outside of the project site boundary. See below...

Customize Your Site Sketch
Once your file has been uploaded or your features drawn, it's time to customize your site sketch.

Below are the ways you can customize your Sketches:
Edit the Name
The system will create a default name for each new feature. To edit the name of your Sketch you will click on the existing name which will allow you to modify the text.
The feature name can be displayed as a label on the map and will also be included in KMZ and Data Package downloads.
Edit the Buffer
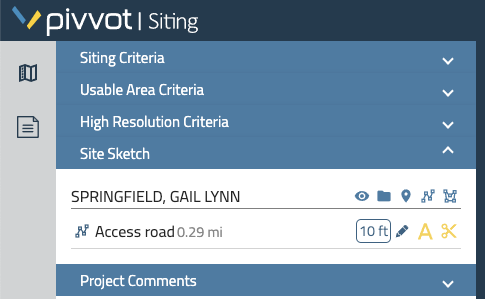
Edit the buffer* of your Sketch by selecting the buffer distance feature and use the arrows to adjust the buffer distance. You may also enter your buffer amount by text.

Note: The default buffer distance is 10 ft, with a minimum of 5 ft.
Display a Label
You have the option to toggle the display of a feature label in the map. The label will display the Sketch name.
To toggle the label you will simply click  button associated with the Sketch record. When this button is selected, the button will be yellow
 and the label will be visible in the map.

Using your Sketch in the Constraint Calculation
By default, your Sketch will be used in the constraint calculation.
To remove your Sketch from the calculation, select the  button. When this button is selected, the button will be blue
  indicating the feature is no longer being accounted for.

If you chose to include your Sketch in the constraint calculation, you will need to recalculate the Usable area for that record.
To do that:
- Locate the associated record in the Project Sites tab.
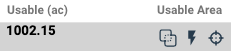
- Scroll to the Usable Area column.
- Select the Calculate Usable Area button.

- Once the calculation is complete, view the new Usable Area total in the "Usable (ac)" column.
Editing Your Sketch
You are able to modify the shape of your Sketch. To do this:
- Zoom to the location. To do this, hover over the record and select the "Zoom" icon.

- Select the pencil icon.

- When in an active edit session, the pencil icon will turn yellow
 and a series of white circles will appear. These white circles represent the geometries vertices or points of inflection. To modify the geometry, click and drag a white circle.
 - Once all edits are complete, select the pencil icon. The pencil will go back to blue and the edit session will be compete.