
Before configuring User Data, it must first be Uploaded.
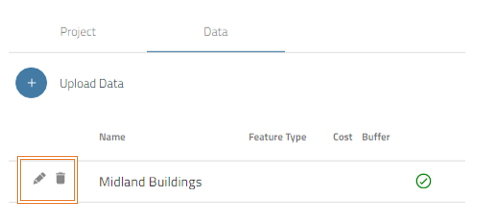
Once uploaded, select the Edit Dataset (above) icon to begin configuring User Data so that it may be applied to the routing algorithm and project reporting.
Utilizing User Data is completed in 3 steps:
Configuration
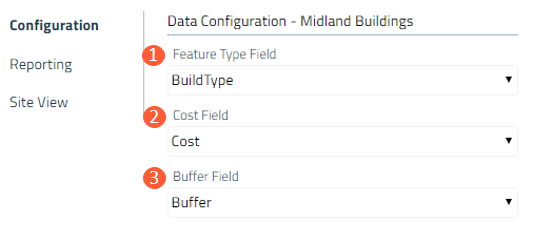
| 1. Feature Type Field | The field selected here will be used to determine Sub-Types when configuring the PLAE algorithm that drives the routing process (Prefer, Low-Avoidance, Avoid, Exclude). |
| 2. Cost Field |
Optional. This field relates to the values in the PLAE. Normally, this is set up on the PLAE page, by using the sliders to select a P, L, A, or E value. However, this can be configured before uploading User Data, by creating a field named Cost (text) and pre-assigning a 'P', 'L', 'A', or 'E' value to each record. If the uploaded data contains a field for Cost where 'P', 'L', 'A', or 'E' values have been populated, select 'Cost' here. If left blank, the Cost will be assigned manually on the PLAE page. |
| 3. Buffer Field |
Optional. Buffer refers to a numerical value (in feet) assigned to each feature. The larger the buffer value, the more a route is going to be pushed away from a feature. Normally, these values are defined on the PLAE page. However, this can be configured before uploading User Data, by creating a field named Buffer (integer), and filling in a value for each record. If the uploaded data contains a field for Buffer and values have been populated with numeric values in feet, select 'Buffer' here. If left blank, the Buffer will be manually assigned on the PLAE page. |
Reporting
Configurations in the Reporting section determine how User Data will appear in Detailed Reports and the Summary Report. Each report type can be toggled on/off to include User Data.
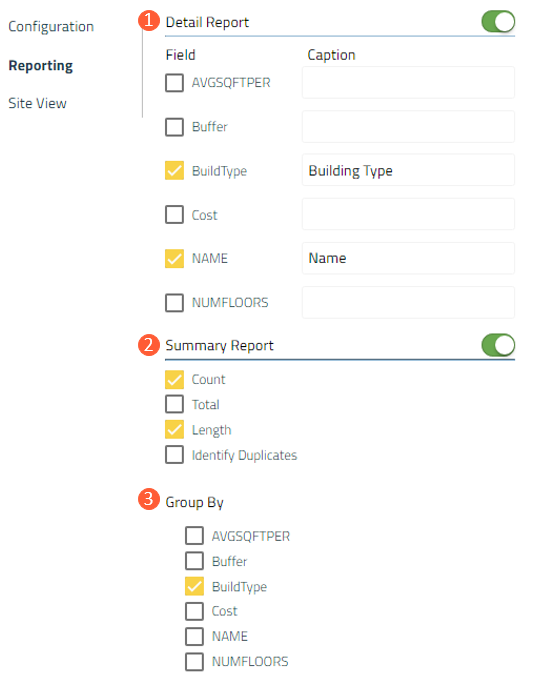
| 1. Detail Report |
To include fields in the Detailed Report, select the check box next to each field name. One or all fields can be included. The Caption text box may be used to change how the selected fields will display in the reports. If left blank, selected fields will display by their default name. |
| 2. Summary Report | The items selected here determine how User Data is shown in the Summary Report:
|
| 3. Group By |
Optional. The selected field determines what attributes will be used for calculations of counts and lengths, as selected in the Summary Report section.
|
Site View
Configurations in the Site View section determine how User Data will display in the project Site View.
For detailed information on editing the symbology of User Data, view Style A Layer.
 Next Steps
- Select the Save icon in the top right hand corner.
- User Data Configurations will now display on the Data tab:
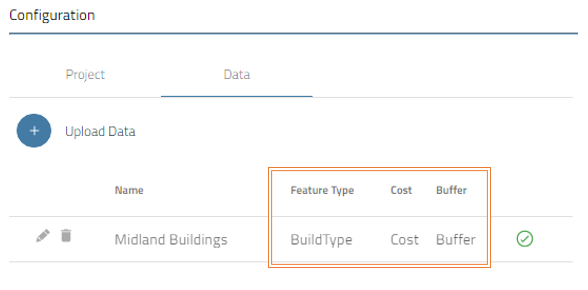
- Select Save Changes.
- User Data can now be applied to project PLAE and included in the routing process.